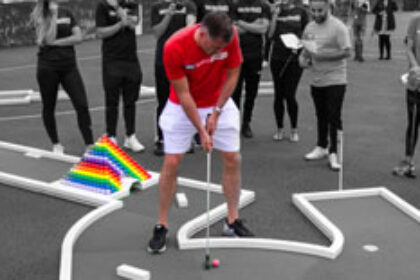
Our Jon’s brief was to make a pyramid of golf balls “like the Ferrero Rocher tower with a tunnel through it” for a minigolf obstacle. With this the thoughts and opportunities spiralled with the different choices we had. Starting from the geometry of the Great Pyramid of Giza (51.5° side angle) and a maximum footprint size, it was time to play with some ideas to see the scale this beast would be.
Working from the bottom up and giving it a base to tie in with the rest of the course, it was time for some balls, well a lot of balls. Calculating that the ideal base size would be 13×13 balls, the next 12×12 and so on, this meant that, if solid, it would take 819 balls to make and weigh over 36kg in balls alone! For a portable feature this wasn’t ideal and as such we decided to make the pyramid hollow and build a supporting structure underneath. This still meant that we’d need 289 balls when taking into account a gap for the tunnel.
Next up was the pattern of the balls – and with the vast array of colours to choose from our brochure – the options were almost limitless. But we decided to present 3 distinct designs, a Union Flag-based option, an art deco/geodesic mash up and a rainbow-style representation. Of these designs, the rainbow design was by far the favourite with its eye-catching colours and the different appearance from each aspect. The ball colours we selected were:
• Primary Red
• Safety Orange
• Sunshine Yellow
• Lime Green
• Royal Blue
• Wisteria Lavender
• Amethyst Purple
The structure of the pyramid and the tunnel needed to be lightweight yet sturdy, so wood was used for its renewable properties and high specific strength and weather-treated for its occasional use outside. To build the support for the balls required a sub-pyramid underneath to carry the weight. Designed using CAD, the correct size and dimensions of frame material was developed to carry the balls in the right place. The main frame was assembled from planed square edge timber to match the rest of the course and strengthened with engineered ply and batons. It was then finished in semi-gloss white for the crisp finish required.
To secure the balls safely they all needed screwing to the frame. This meant drilling all the balls and hand attaching them to the support structure. Using a drill press (and a lot of patience) precisely aligned pilot holes were made to guarantee tangency and alignment. Each face of the pyramid was assembled precisely with the correct colour of ball in the right location and then these were attached to the main support, completing the build.
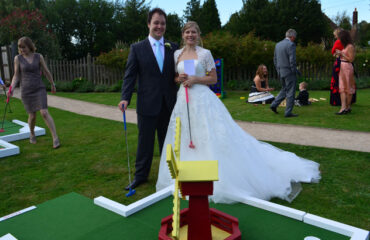
Since completion the pyramid has been a big success, entertaining at dozens of corporate events, weddings and even TV shows! Incredibly it also has amassed over 1 million views on YouTube as part of #SKYSportsDay with F2Freestylers. Contact us to hire this unique crazy golf obstacle together with our putting course for your next function.


